Wednesday, January 29, 2014

Achieving Ash Blonde/Brown Hair

Ash blonde is probably one of my favorite hair colors! The hints of silver with brown is such a soft tone that is really pretty! But, it is a big change in the care for your locks as well as the color, and to upkeep the tone takes some time and money, too! I once had and maintained a hair color that was close as I could get to ash blonde, and if you're interested in finding out what I used to achieve it, keep reading!

My ash blonde hair:


Here's what my hair looked like before:


One Beyond the Zone bleaching kit later...


and after bleaching!
I thought this color was so cool, now I can't stand a day with it, lol.

Bleaching:
You can bleach your hair with any bleaching powder + developer (I use 20-30 volume now, the kit I first started with was 40 vol). Make sure to get both of the items! The powder usually comes in a tub, and the developer in a shampoo-like bottle. These two products can be easily found at Sally's Beauty Supply if you live in the US, or any other beauty supply store that stocks hair products, and shouldn't exceed $25 most likely. You mix the powder with the liquid developer as it instructs you on the bleaching bin, and you apply the paste you've created to your hair evenly, then watch the clock. This is important, because if you over-develop, your hair will be... well, over.

So be warned, once you bleach your hair, it will be a lot thinner and will break easier, resulting in split ends and can result in frizzier hair. Bleaching strips your hair, literally, which is why it can be stringy and like elastic post-bleaching. I feel that bleached hair requires more care and attention than normal, so only do so if you are ready for the time and commitment! If you don't take precautions with bleaching hair, many a time I see people ending up chopping their hair off to "start over".. I once have chopped my hair off to shoulder length to start a healthier phase of my bleaching journey when I had bleached it many a time. I hated it :P

It's a good idea to give your hair a rest after the bleaching and not add more chemicals to it for a few days or so, so it's not a bad thing to do this when you know you'll be home for a while. A deep conditioning session would be lovely for your hair, too! I have tips for bleached hair here!

Dying:
Now, after you've successfully lightened your hair, you can dye/tone it to the shade you desire. I have used both the boxed dye and liquid dye + developer from Sally's to achieve the ash color. I have used:


L'oreal Paris Superior Preference in 7 1/2 A Medium Ash Blonde - $9-11 USD


Wella Color Charm Liquid Permanent Hair Color - $5-6 USD
(I got it in 7# colors, such as the links below)

Personally, these results would last about 2 weeks before fading back to a brassier tone. Depending on how often you wash your hair, results may vary.

Good luck! (^-^)/

Monday, January 20, 2014

How Much Makeup Is Too Much Makeup?

In my personal experience, there was a point in my becoming-a-teenager phase where any hint of makeup at all was the most attractive thing ever. Perhaps I continued to think this way because I wasn't permitted to use any of it until I was fifteen, which, looking back, was still pretty early. And like I've written so many times before, I became reliant on makeup and the appearance providing me with confidence.

But after my abrupt halt in makeup usage, being exposed to so many photographs of natural style models, and then meeting and becoming close to people who didn't find makeup so attractive (and people who did), it made me realize how it felt like the makeup I would wear when I would actually try (lol) really did feel like too much for me at that point. Not only that, but I felt prettier when I wore my minimal ten minute makeup routine face. (Which is very necessary when you get up at 5am for commute.) Fifteen-year-old me would have never believed that in a hundred-- well, four years haha.

So all in all, it's however much makeup you think is right for you and what makes you happy. It changes from person to person and experience!

Saturday, January 18, 2014

How To Get Straighter Brows

Straight brows are very prevalent among Korean models especially. They give a very youthful look and adds more focus to the eyes in my opinion! Larger foreheads seem to be popular in Asian countries, and straight brows also give more emphasis to the forehead.

I used to be confused about how to make my eyebrows straighter with the eyebrows that I have, as they always ended up rounded or some other unwanted shape. But with experience I realized it was just a matter of tweezing and filling spaces that might have been forgotten, such as the ends and tops of the brows. I by no means have perfect completely straight brows! But this is the process I use to make them straighter.

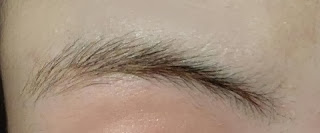
Here's the straightest I got my brows last summer using these methods huehue.

Minimally, all you need is a hair removal tool (tweezer or razor) and way to fill in your brows (shadow or powder or pencil)!

Products used:
- Revlon tweezer
- small Razor (Daiso brand, comes in set)
- NYX Eyeshadow Single in Dark Brown
- small angle brush
-or, brow pencil
-concealer (optional)
-white eyeliner pencil (optional)


Step 1: Figure out the shape you're going for.
Here are unkempt brows. Comb them if necessary to make the hairs go in the direction they usually grow. I find the naturally straightest area to work with and decide the relative thickness. If you'd like, you could even draw with white eyeliner around the area to make things easier.


Step 2: Fill in the areas that are lacking.
Within your imaginary lines, fill in the spaces that lack brow hair with the small angle brush and eyeshadow/brow powder (or eyebrow pencil) that is closest to your brow color.

Pictured below are the general areas that I would fill in.


Step 3: Remove the unwanted areas.
Using the areas you just filled in as a guide, remove the areas of hair that protrude from the straight imaginary area of your natural eyebrow that you planned out earlier. You can do this using a razor, which is especially helpful the first time you attempt this because it gives a much straighter edge, but once you know the shape you're going for, using a tweezer makes longer results.


Step 4: Conceal.
I didn't use it here, but if you wish to, you can use a concealer above and below the brow to make them appear even straighter!


Done!

I don't want to deviate too far from my natural brow shape, but overall they are much straighter than before. I hope this helps somebody :)

Friday, January 17, 2014

How To Lighten Your Brows

When I first started dying my hair lighter, something had to be done about my clashing black brows. They did not match at all and the clashing color drew too much attention to them. If you've ever been in the same situation, or just wish to get lighter brows, here are a few of your options!


1. Trim.
Using a small comb or clean mascara wand, comb your brow hairs upwards and trim with scissors or a razor. When the hairs are less dense, it's easier for them to appear lighter. Be very careful though! The only thing worse than clashing brows are brows with spots you accidentally hack off :P If your brows are thick/long and you wish to use the following two to three methods, then you probably want to do this first!
e.l.f brow comb, razor from Daiso
2. Brow powder.
There are powders that are specifically made for certain hair colors, which are quite handy and saves time with having to choose the right color on its own! However, you can also use an eyeshadow, just make sure it's not too light or dark, and use a small angle brush to apply. This doesn't change the color much though unless you've trimmed them first. Powder is great for a natural look!

NYX Eyeshadow Single in ES06 Dark Brown & small angle brush from Walmart

3. Brow pencil.
Pencils are great for a precise arch, and altering the color as well! As long as you work in short, light strokes, you can change your brow color without it looking too harsh. Again, trimming first is probably best if you want to use solely this method.

Revlon Brow Fantasy Pencil in Brunette

4. Brow mascara.
 It coats your brows with your desired color. Personally, I haven't used this product much, but I do hear good things about it. If you don't want the commitment of bleaching your brows, this is your thing to try. I've only tried the gel side of the brow pencil I have, and it's also a quick way to lightly fill in sparse areas with color!
Revlon Brow Fantasy Pencil in Brunette, gel side
5. Bleach.
My personal favorite is to simply bleach your brows using a facial bleach kit like those shown below. (Don't use a hair bleach though, this is probably really damaging if it gets in your eyes and may be too harsh for your skin!) It's the quickest way to lighten your brows with results that last quite a while - around a month, in my case. They wouldn't make your brows that bright, golden, bleach blonde like I used to think... As long as you don't leave it on for too long! For me it gives a light brown color. 

All this method requires is following the instructions which typically consists of merely  mixing together the bleach and activator, applying onto your brows, waiting for ~10 mins, then washing off!

Surgi Invisi Bleach from Sallys & Sally Hansen Creme Hair Bleach

Here's an example:

A month or so without bleaching. Black regrowth is prominent on the right side and tops.


Post-bleaching! Much lighter.

Monday, January 6, 2014

Tutorial: Ulzzang Eye Makeup For Monolids

Pretty Korean models and/or ulzzangs already have beautiful eyes to begin with and the makeup they wear is not very obvious. In this tutorial, I will be mimicking the shape of many of their eyes, not necessarily copying their makeup. (Some ulzzangs do have heavier-looking makeup, like Ji Hee, so pretty :D) I hope you find this helpful either way c: 


Edit* Keep reading for the tutorial~


Step 1: Line your upper lid.
With the outer edges of your upper and lower lid primed, line your upper lid with gel liner while your eyes are open, and extend a wing following your natural eye shape to where your bottom lashline is lowest. Use a small stiff brush with a point preferably, which sometimes comes with the gel. Then fill it in.


Step 2: Apply mascara as a guideline.
I like to apply mascara to the center of the lower lashline (and sometimes even towards the inner corner) to serve as a guide for our bottom/shadow liner next. Don't apply all the way to the outer edge, because we're leaving that area bare.


Step 3: Apply bottom eyeshadow.
Extending from where you ended your mascara, apply a line of brown eyeshadow using a small angle brush horizontally towards the outer edge. (Fyi, his is supposed to be mostly straight, but the picture perspective makes it look angled!) Extend your eyeliner downwards to meet the shadow if necessary.


Step 5: Line the lower lashline.
First, using the same gel liner, make a short line mark in the center of your water line.


Then, continue to draw a horizontal line as neat and thin as possible starting from the mark you just made to the end of your eyeliner wing (none in the waterline except for the center!).


Step 6: Apply mascara.
Curl your lashes and apply mascara. See how I apply mascara to my stubborn lashes here. I added a bit more to the bottom lashes here.


Step 7: Add eyeshadow.
If you wish, add a bit of brown eyeshadow to just above the slanted part of the upper liner to add a bit of an illusion of depth.


Here's an angled picture to show how straight the lower liner really looks:


Step 8: Aegyo-sal.
To complete the look, you can optionally add some shimmery flesh toned eyeshadow (I find white too harsh) and a contrasting color to make the smiling/puffy eyes look, or aegyo-sal that many Korean models have.


Done!

I see ulzzangs wear circle lenses like 90% of them time, so if you have circle lenses use them, too! *I thought if I had circle lenses it would look more K-inspired so I took the liberty of trying to sloppily GIMP it on in the first pic, first time I ever altered my eye so much it's kinda freaky. I should get circle lenses irl already...

Products used:
Small angle brush
Small hard brush (came w/ gel liner)
Maybelline Eyestudio Gel Liner in Blackest Black
NYX Eyeshadow Single in ES06 Dark Brown (like light brown)
NYX 10 Color Eyeshadow Palette in Champagne and Caviar (just used for shimmery flesh tone)
Eyelash curlers (Revlon & Daiso)
Maybelline Define A Lash Mascara Lengthening in waterproof
Maybelline The Falsies Mascara in waterproof
Too Faced Shadow Insurance Primer

Sunday, January 5, 2014

How To Get Good Grades In Your College Classes

With classes starting again tomorrow (omg but not really that exciting with having countless "first days of school" within the last three years), I wanted to re-remind myself and tell anyone who cares to read this how to have a successful quarter! Which feels really imperative with all that tuition money and parking fees ahh.

I started out with most of these habits which is why my good ol' first quarter went pretty awesome in fall of '11 was it?, but I later slacked off and my grades and self-esteem with understanding and such all decreased. Thankfully, last quarter I was able to reevaluate study habits and made myself go strong the whole time despite having other troubles - it is possible! Here are the guidelines on how to get those 4.0's.


1. Plan your classes and pick your professors early.
Make sure you know what you want to take, so as soon as you're allowed to register for the next quarter, you can jump on it without being indecisive and ending up on waitlists. Pick good professors for the classes you want to take by asking around - question classmates who've taken the classes you want how well their teacher taught, how the workload/tests were, etc. (But keep in mind just because it was easy/hard for them doesn't mean it will be the same for you! I've taken some good teachers despite what others said about their teaching style.) Or of course you could always check out the Rate My Professor website to confirm your decision! No matter what the class is, if you have a teacher whose teaching you don't comprehend (or who gives out tests on material that wasn't covered /ugh), it will be exceedingly difficult.

2. Balance your time.
Know how you're going to manage your time before you do anything. That being said, make sure your subjects are balanced with maybe 1 hard course and 2 intermediate, or vice versa (do not take all 3 hard courses unless you know you can handle it - you will die). You want to be able to have enough study time to conquer all you need to do for all of your classes, so plan this chunk of time out! And this is so important - to leave time to sleep!!! You can study your butt off one night, but the next time you show up for lecture it will be hard to understand anything and you will have to work twice as hard to understand the material on your own.

3. Read your textbook.
It's sometimes the most boring thing in the world, but just do it. (Try to convince yourself that this learning is exciting :D) You'll be so much less burdened later. Know what material is going to be covered beforehand (this should be listed in your syllabus, and if not, just ask your professor), and then read the textbook sections before you show up to lecture. You'll be able to follow along so much easier and won't have that huh-I-don't-get-what's-happening feeling the whole time. Take notes while you read so you can save all the important parts for review later (typing out notes is super easy and makes it esasy to find things later! ctrl+f). Of course we know and have experienced some classes that don't require reading pages upon pages and the teacher covers everything - if you find out your class is like that then whoohoo jackpot, but always do this anyways for at least the first few weeks. It's better to stay ahead than to fall behind.

4. Study and review as you go along.
Let's face it, not studying can be fun, but the chances of getting the grade we want after cramming for a test is pretty close to none. Falling behind makes us feel overwhelmed, so keep up as best you can. At the end of each chapter or section, make sure you understand all that you need to know for the exam later. You will be so much less stressed come the time of the test, and will have all you need to know ready. Use your time wisely and review with your notes that you wrote/typed from your textbook! See how this all connects? The most practical way to do this in my case is to use the notes to create flashcards and then quiz myself. I just use my mascara index cards to do this hehe.

5. Be prepared for class.
Know when exams are, when labs are, when homework is due, etc. Write this all down in a planner or calendar you look at daily so nothing will sneak up on you and you won't fall behind. If you do get assigned outside work, do it as soon as you get it. Make a daily/weekly checklist of things you need to finish, including reading chapters. If you have questions, make sure you have them when you go to class so you can ask your teacher in person, or go to their office hours. If you have a question at home that you need answered asap, email them! It's so much easier to complete a class successfully when you get your confusions cleared up. Plus, then the teachers know you for being the responsible student you are when you make the effort to communicate with them.

6. Stay motivated.
It's really easy to not want to do these things, but when you realize you feel this way, then that's the first step in picking your classes back up. If you're feeling discouraged to study, etc. remember why you want to finish school, whatever your reason may be! To work towards your dream job, to become stable to support a family someday, to make money to buy a pony and barn... We all have different motives, use them to inspire you to work hard!


I see so many people struggling after transitioning from hs to college and wish everybody knew these things earlier, but if you read these tips it's sure to be quite a bit easier - it's just up to you whether you want to follow them or not ;) Good luck with the upcoming quarter!

Rimmel Moisture Renew Lipstick Review & Swatches

With such regal purple packaging and a name like "moisture renew", this was a must-try product during my lipstick search.


These are the two colors I own: 220 Pink Chic, 300 Rose Blush.


220 Pink Chic, 300 Rose Blush
swatches, respectively


220 Pink Chic


300 Rose Blush

Packaging: 
The packaging is just gorgeous. From the purple shiny exterior to the crown embellishment, it looks super luxurious! The cap also fits snugly with a click, not flimsy at all.

Formula: 
This lipstick is quite creamy, and glides on without any trouble. And it does indeed feel moisturizing! There is a bit of a interesting flowery lipstick scent that I'm not sure if I like or not, but it's nothing so bad imo!

Color: 
The colors of these really show and are quite close to the shade on the sticker label on the bottom! However, again, it's a glossy and not matte finish, which I'm not partial to.

Lasting:  
These last for a generally good deal of time before having to reapply.

Price: 
At around $6, this is an excellent deal! Especially for sixteen-year-old me back then who was just trying out all sorts of makeup when I got this, so I couldn't afford to spend too much!

Overall: 
100% recommend if you're looking for a nice drugstore glossy lipstick! During my lipstick trials and errors, I stopped after purchasing so many lipsticks because I found what I was looking for, a nicely pigmented lipstick at drugstore price!

Hope you enjoyed this review!

Saturday, January 4, 2014

Sephora Lipsticks Reviews & Swatches: Rogue & Lip Attitude Glamour

I got these Sephora Collection lipsticks when I wanted to dip into "higher-end" lipsticks without actually buying $20+ ones :P They come from the high-end Sephora store, but are these even considered higher end? I don't even know.

When I bought the second one, it was called Lip Attitude Glamour, however, as I can no longer find it on the website, it may be called Rogue Shine now. Anyone know if this is the case? Anyways, I will be reviewing the Sephora Rogue & Lip Attitude Glamour lipsticks separately as they give quite different impressions! 

Sephora Rogue on the left & Lip Attitude Glamour on the right.


Names of the lipsticks on the inside. No color names, just the number.


Sephora Rogue R18 Oh Oh!, Lip Attitude Glamour G05 Pink Caress
swatches, respectively


Sephora Rogue

Sephora Rogue R18 Oh Oh!
The color is described as a muted pinky brown.


Packaging: 
Very minimal with it's all black exterior, and I didn't even notice that the bottom said "Sephora" for quite some time. While I don't particularly enjoy the way the cap takes up the whole body of it, it seems to be relatively durable.

Formula: 
Quite creamy lipstick! It has a tiny bit of that lipstick scent/taste, just beware.

Color: 
Excellent color. The most pigmented lipstick I own, by far. I love playing with this because it's practically like paint! While it is described as a "muted pinky brown" I found it to be a quite reddish vampy color on my skin tone, which I love. There is a tiny bit of shine that isn't so noticeable, which I like!

Lasting:  
Lasts long, especially with all that pigment! Even when I try to take it off, there's still a bit of a tint and I have to use Pond's Cold Cream to get completely off :P

Price: 
When I bought this two to three years ago, it was $10, but it looks like it's went up to $12.50. A bit pricey, but still about half of higher-end lipsticks, however, not half the quality!

Overall: 
An amazing, highly-pigmented lipstick. Would buy again. In fact, I did when I lost my first one in high school. Silly little sophomore, wearing red lipstick to school :P That's how much I like this lipstick!


Lip Attitude Glamour (or Sephora Rogue Shine?)

Bare lips for comparison.

Lip Attitude Glamour G05 Pink Caress


Packaging: 
Much prettier shiny case :) But again, I don't like the cap taking up nearly the whole thing.

Formula: 
Goes on pretty smooth and wet. Unlike other pink sheer lipsticks, it doesn't settle into the lines of the lips! It feels pretty hydrating, too.

Color: 
Being a sheer lipstick, and making very little color difference on my lips, I'm surprised at how much I like this! While I'm not so partial to the shiny lip, this one gives just the right amount of sheer pinkness and gloss that make the lips look like... pretty "pink slugs". I read that in a children's book once I believe. Ahem.

Lasting:  
Lasts okay, but like with most glossy lip products, you'll need to reapply after a bit. 

Price: 
This was also $10 when I first bought it (and if they did indeed just change the name it would have went up to $12.50), which I feel is a bit high for a sheer lipstick. I would be more willing to pay higher prices for pigmented lipsticks rather than sheer ones, even if they're really good like this one!

Overall: 
A pretty, sheer lipstick that I enjoy quite much.

~

I hope you enjoyed this review, albeit being a bit outdated! :1

Here's some extra pics when I was having a bit of fun. It's srsly like paint man. Can you tell I don't have a lip brush handy?